Alignment Labels
| Menu: | Via Label Plan |
| Ribbon: | Via Label Plan |
Introduction
Alignment Labels will produce a variety of intelligent labels along an alignment, usually to document distance along the alignment and optionally the alignment geometry. This type of label requires the user to do two things:
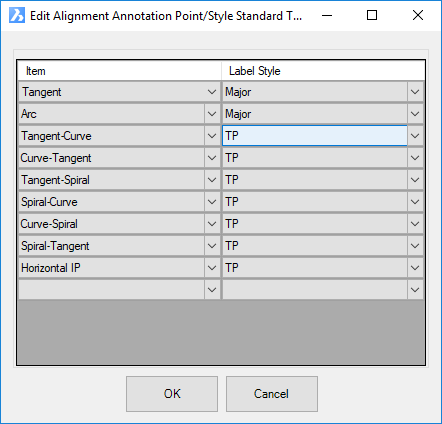
Establish what alignment geometry should be labelled (eg: start, end, tangent-curve, curve-spiral, etc) and what Label Style should apply for each case. The styles created can be used for other projects and stored within the global settings for inclusion in new projects. Label Styles are managed via the Label Styles command.
Select a Named Section List with the chainages to use - in the Section List each chainage included comes from a source (such as the start/end of alignment, tangent-curve, curve-spiral, etc). The relevant sources of chainages are then used to label along the alignment
The marker of an alignment label cannot be moved, except by editing the alignment geometry.
| Grip Editing | ||
|
 |
|
|
Moving the marker grip will reposition the entire label and update the Label content if referencing an alignment (and/or surface). Use the Sychronise Labels command to update label contents where necessary. |
|
|
Moving the text grips will reposition the Label text only. |
|
| Users can grip edit any lines added to the Label Style. After any grip edit of the line, the direction is set (does not change angle when moved around). Only the Reset Labels option can reset this back to being dynamic to the alignment direction. | ||

Updating Labels |
| Labels values will update after moving the alingment and clicking on the Synchronise button. |
Details
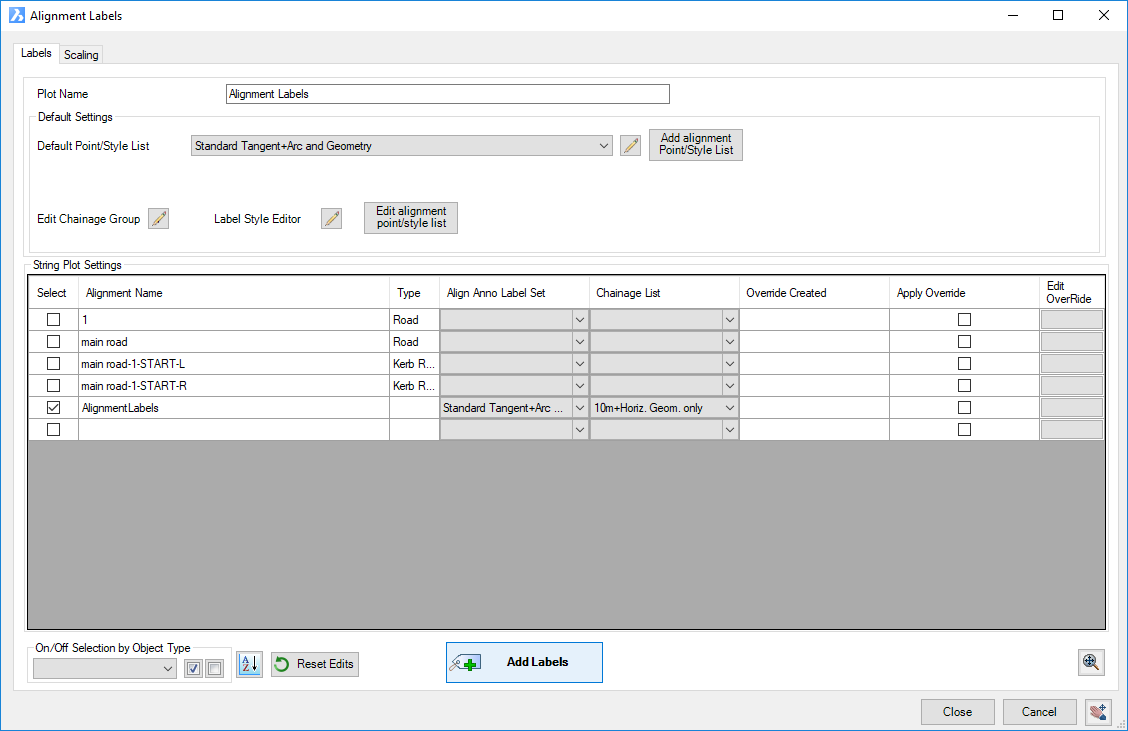
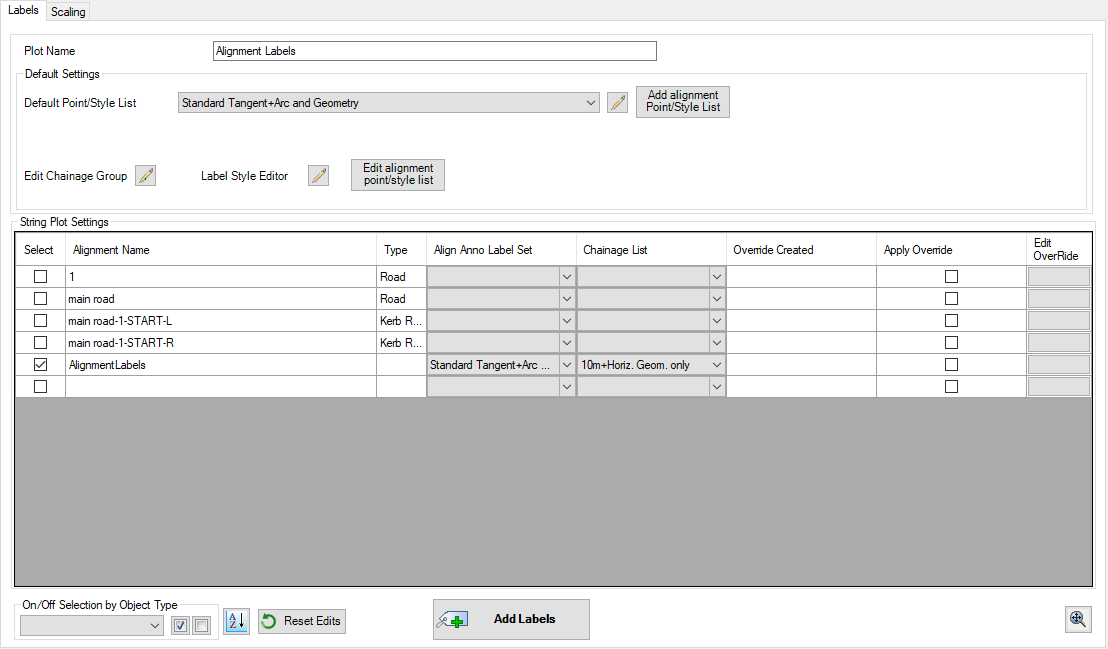
These are created via the Label Plan command. If new, users will need to firstly name the group. The followng form displays:
|
|||||||||||||||||||||||||||||||||||||||||||||||||||||
Plot Name |
Name of the currently selected label set (not editable). |
||||||||||||||||||||||||||||||||||||||||||||||||||||
Labels Tab |
|
||||||||||||||||||||||||||||||||||||||||||||||||||||
Scaling Tab |
This tab manages the scaling of the labels within the drawing |
||||||||||||||||||||||||||||||||||||||||||||||||||||
|
|
||||||||||||||||||||||||||||||||||||||||||||||||||||
Option |
List each option indenting 2 spaces. |
||||||||||||||||||||||||||||||||||||||||||||||||||||
OK |
Apply and exit. |
||||||||||||||||||||||||||||||||||||||||||||||||||||
Cancel |
Exit the form without deleting any data. |
||||||||||||||||||||||||||||||||||||||||||||||||||||

Add any notes about the output controls and any special conditions.