Create/Edit Cross Section Labels
Icon: ![]()
Menu: Roads > Settings > Create/Edit Cross Section Labels
Ribbon: Roads Tab > Plan Production Panel Slideout > Create/Edit Cross
Section Labels
Introduction
Civil Site Design can plot label information at any named component of a cross-section.
This command enables the user to set the details of the labels to be plotted at each location.
Details
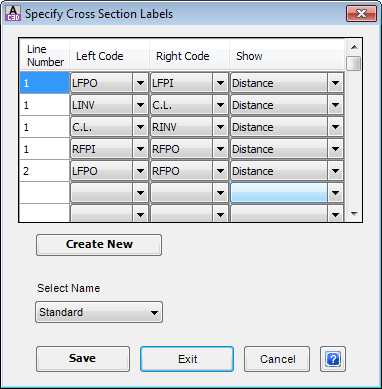
Upon selecting the command the following form is displayed:
 |
|||||||||
| Table | Use the table to set up the required format to show the typical section details on a drawing. | ||||||||
| Line Number |
Enter the line of typical details to display the data. Take
care, no check is made for overlapping sections. It is
intended that any overlapping information would be placed by
the user on a new line. E.g. The first line might show the distance from LEB to REB. Clearly if it is required to show a distance from C.L. to LEB, this would have to be placed on another line. |
||||||||
| Left Code | Select template code required | ||||||||
| Right Code | Select template code required | ||||||||
| Show |
|
||||||||
| Create New | Creates a new table | ||||||||
| Select Name | Use the list to change the current table | ||||||||
| Save | Click to store the edited or new table | ||||||||
| Exit | Apply changes and exit the form | ||||||||
| Cancel | Exit the form without saving any changes | ||||||||
Note: The table to be used for a given road is selected on the cross section display using the tab Select and entering the required name in the field
Section Annotate. For information on using the table data see
![]() Plot Cross Sections.
Plot Cross Sections.
Below is an example of cross section labels. In this case, data is all displayed on Line 1 and only Distances are shown.
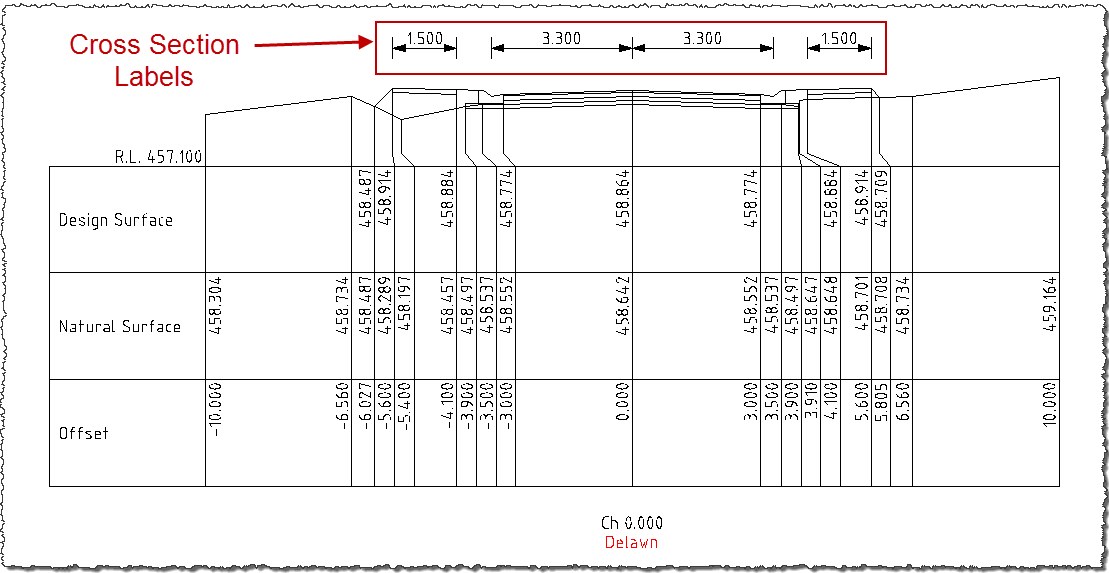
Note: Unless there are changes in the data
(distance or crossfall), labels will only be shown on the first
cross section of each page. When there is a change, all the
labels will be displayed on the cross-section at this chainage.