Multi String


Icon:
   
  
Menu:   Roads > Labels > Multi String
General > Labels > Multi String
Ribbon:   Roads Tab > Plan Production Panel > Labels Dropdown > Multi String
General Tab > Labels Panel  > Multi String


Introduction

The Multi String command provides functionality to add plan labels to multiple strings at once, assuming labels are required along particular codes of the string/s and at particular chainage/s.

Below is an example output:

Multi String Plot Outputs - Controls

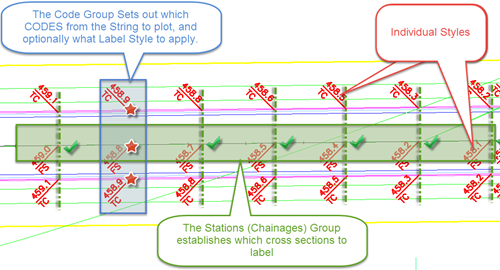
When using Multi Plot, users need to establish the codes to include in the labelling (the Code Group ) and where along the String/s to apply the labels (the Station/Chainage Group).  A default Label Style is required, in case it is not assigned as part of the Code Group.  Visual sketch of the controls is below:
 

Details

Upon selecting the command the following form is displayed:


 New Label Group Name (Plot Name)

Type in to create a new Label Group

Label Group List

List of label groups created.  Select one to edit the label group.

  List of Label Groups

List of named Label Groups

OK

Create a new Label Group or open a previously created Label Group

Cancel

Exit

After clicking OK the following form is displayed:


Plot (Label Set) Name

Name of the currently selected label set (not editable).


Delete the current Label Set Name with option to delete all associated label objects in drawing

Labels Tab


Default Settings

These default Label Styles apply to the Strings that are set to be labelled, except where specific overrides have been applied to the individual string/s.

  Code Group (Codes to Plot)

Pick list of Code Groups to apply by default

  Edit Code Group

This opens the String Code Label Settings command for establishing which Codes to label and, optionally, the Label Style to apply.

  Label Style

Pick list of Label Styles to apply by default, if not specified in the Code Group.

  Edit Label Style

This opens the Label Styles command for establishing the Label Style to apply, if not specified per string or as part of the Code Group.

 Edit Chainage (Station) Group

This opens the   Section Manager command for establishing lists of chainages/stations.  The highlighted string, or otherwise first string, in the list will be used for editing the section list.
This list is useful

String Plot Settings

Displays a list of all Strings.  Users can tick on to label select strings, as well as set the Code Group, Section List and Label Style to apply

  Select  Tick on to include that String in the labelling output
  Design String List of Strings
  Type Type of String
  Code Group Pick a Code Group  to apply, if not applying the Default Settings
  Chainage/Station Group Pick a named Chainage/Station list to apply.  The Standard list will be applied if nothing is selected before clicking Add Labels
  Label Style Pick a Label Style to apply, if not applying the Default Settings Label Style

On/Off Selection by Object Type

Provides on/off toggle of the Select column, based on the type of String
  Pick List  Pick list of the String type
    Turn on strings of type as set in the pick list
    Turn off strings of type as set in the pick list
Sorts the String Plot Settings list using the column of the cell selected in the list.
Select to reset all grip edited labels to default positions, as well as restoring any labels deleted from the label group.

Click to add all Labels in the drawing as per the String Plot Settings

Zoom String

Zooms to the selected string in the list.

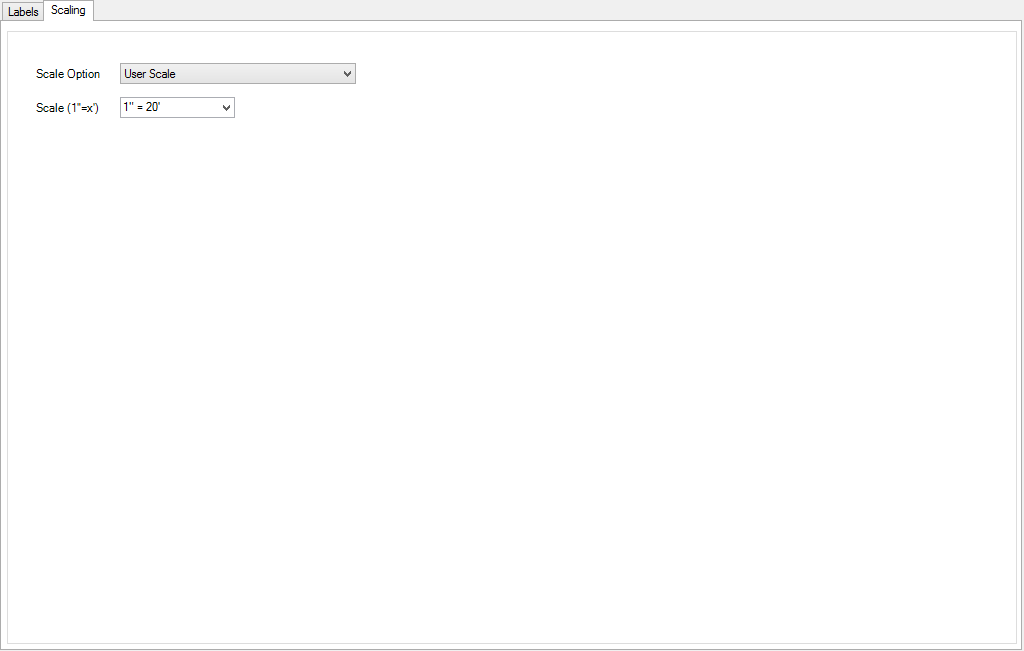
Scaling Tab

This tab manages the scaling of the labels within the drawing


  Scale Option

Pick the following options
  Always use drawing scale The label sizes are defined by the user annotation scale set in the drawing (CANNOSCALE)
     Keep first drawing scale The drawing scale at the time of the Labels creation will be permanently stored & used regardless of future drawing scale changes.
User scale User can define the drawing scale of the labels using the box below

  Scale (1:x)

Select a list scale from the list or type a custom scale
Close Close the form
Cancel Cancel actions on the form and close.
Pan Pan in the drawing.  Press any key or left click the mouse button to return to the form.