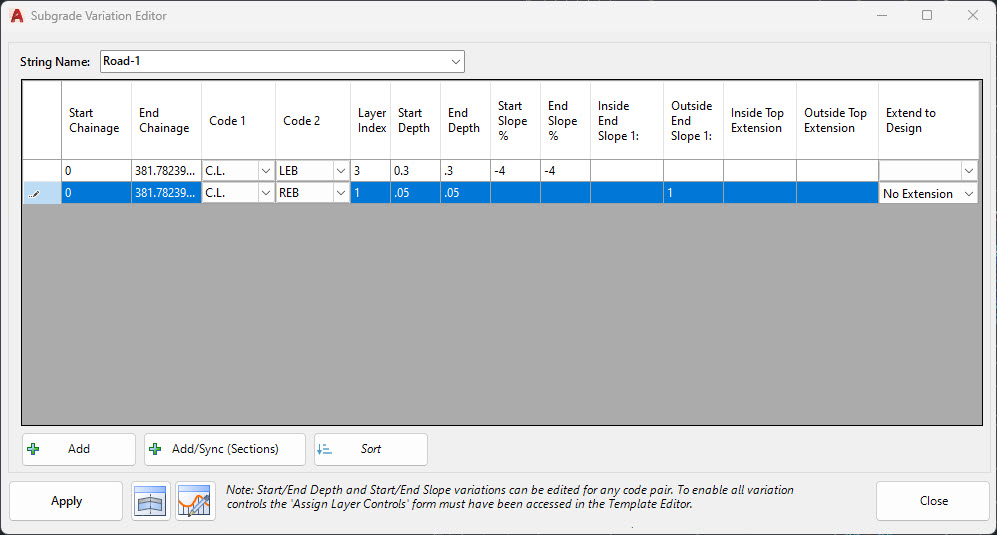
Subgrade Editor
Icon: |
|
| Ribbon: | Roads Tab > Select Panel > Subgrade Editor |
Introduction
This command provides the user with control over the depth, crossfall slope (%), width extensions and edge slopes for any subgrade layer over any distance range along the string.
The changes are applied over a distance range (start chainage to end chainage) for a section (defined by a Code Pair - Code 1 and Code 2).
Layers cannot be created using this form. The layer must exist (with any depth, including zero) in the Template being applied to the String.
Note: To delete row/s, simply highlight the row/s and press Delete on the keyboard.
Setting a different Start Depth and End Depth will result in a linear change in depths between the Start Chainage and End Chainage. This same behaviour applies to the Start/End Slope controls
Activating all Variation controls
These overrides can only be applied if the user has accessed the Template Editor and run the Assign Layer Controls command for the selected Code Pair:
-
Inside End Slope 1:
-
Outside End Slope 1:
-
Inside Top Extension
-
Outside Top Extension
-
Extend to Design
Details
Upon selecting the command the following form is displayed:
|
|
|||||||
|
String Name |
Select a String for editing |
||||||
|
Subgrade Variation Table |
|||||||
|
Start Chainage |
Set the start position to define a range over which to run the Conditional Template check |
||||||
|
End Chainage |
Set the end position to define a range over which to run the Conditional Template check |
||||||
|
Code 1 |
The section to edit is defined by two Codes in the cross section. Code 1 is selected here. |
||||||
|
Code 2 |
The section to edit is defined by two Codes in the cross section. Code 2 is selected here. |
||||||
|
Layer Index |
Layer depth to apply the edits to | ||||||
|
Start Depth |
Layer depth to apply at the inside Code at the Start Chainage |
||||||
|
End depth |
Layer depth to apply at the inside Code at the End Chainage |
||||||
|
Start Slope |
List each option indenting 2 spaces. |
||||||
|
End Slope |
List each option indenting 2 spaces. |
||||||
|
Inside End Slope % |
List each option indenting 2 spaces. |
||||||
|
Outside End Slope % |
List each option indenting 2 spaces. |
||||||
|
Inside Top Extension |
List each option indenting 2 spaces. |
||||||
|
Outside Top Extension |
List each option indenting 2 spaces. |
||||||
|
Extend to Design |
List each option indenting 2 spaces. |
||||||
|
|
Click to add a new entry in the list |
||||||
|
|
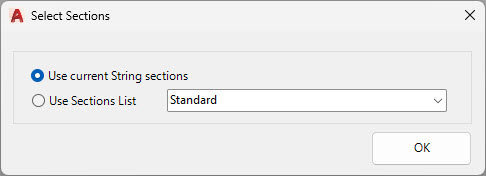
At the message box entitled 'Use Selected Row?' select Yes to proceed. The following form will display:
|
||||||
|
|
Sorts the entries by start chainage/station order |
||||||
|
Apply |
Applies the changes to the cross sections for the selected string |
||||||
|
|
Opens the cross section window to review design cross sections |
||||||
|
|
Opens the Vertical Grading Editor to review the vertical string design |
||||||
|
Close |
Close the form |
||||||
 =
=