|
| |
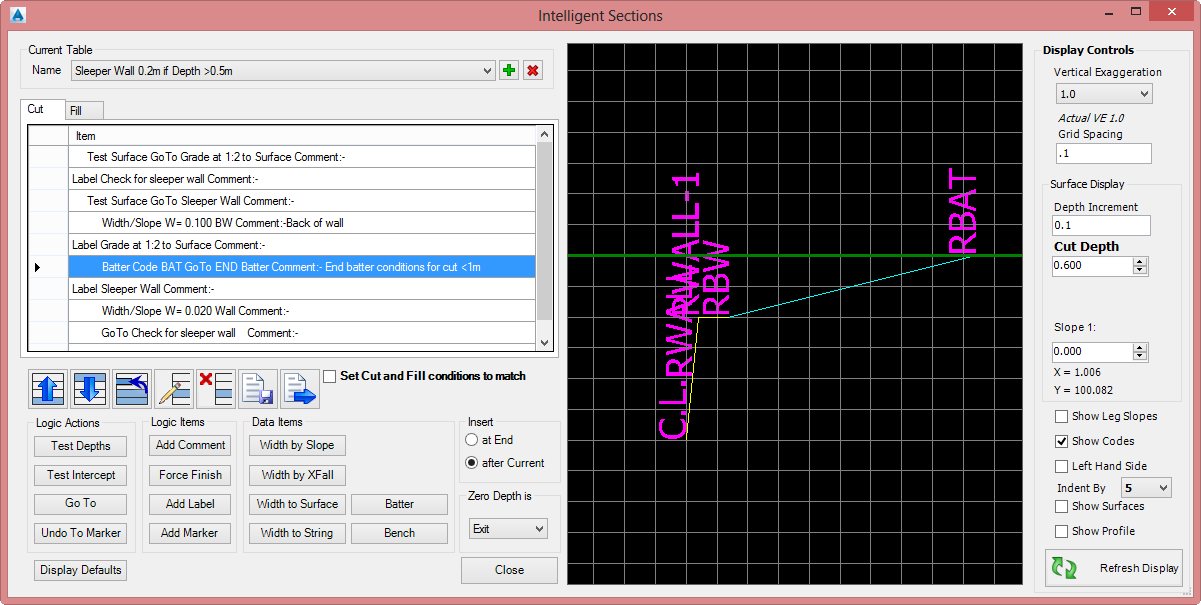
Template Create and Delete Tools |
| Current
Table |
Use the pick list to choose a template (table) to edit or apply.. |
| Create New Template |
Click
 to create a new template (table)
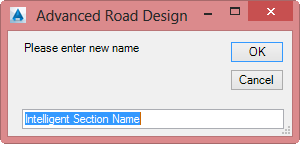
| Enter New Name |
Give the new template (table) a name. |
| OK |
Click to create the
template (table). |
| Cancel |
Click to exit the form without creation. |
|
| Delete Current Template |
Click
 to delete the
Current Table (template). to delete the
Current Table (template). |
| |
Editing Tools |
| Cut Situation |
Click this tab to edit the template when in cut. Designers are able to add Data controls in the list. The display window on the right will adjust to show a cut
condition.
|
| Fill Situation |
Click this tab to edit the template when in fill. Designers are able to add Data controls in the list. The display window on the right will adjust to show a fill
condition.
|
|
Edit Data |
Select a line
to edit, then select the edit
tool. |
| Move Up |
Click
 to
move the selected item up
in the list to have it processed earlier. to
move the selected item up
in the list to have it processed earlier. |
| Move Down |
Click
 to move the selected item down
in the list to have it processed later.
to move the selected item down
in the list to have it processed later. |
| Edit Selected |
Click
 to
move a group of highlighted items in the list. Use
[Shift]+selection or [Ctrl]+selection to select multiple
entries. A form will display to edit the item. The form that
displays depends
on the type of data
entry highlighted for edit, and is as shown
below. to
move a group of highlighted items in the list. Use
[Shift]+selection or [Ctrl]+selection to select multiple
entries. A form will display to edit the item. The form that
displays depends
on the type of data
entry highlighted for edit, and is as shown
below. |
| Edit Selected |
Click
 to edit the selected item. A form will display to edit the
item. Users can also double click to edit on an item in the
list to edit that item.
to edit the selected item. A form will display to edit the
item. Users can also double click to edit on an item in the
list to edit that item. |
| Delete Selected |
Click
 to remove the selected item from the list.
 |
|
Save Template |
Click
 to
save (export) the current template (table). Navigate to a
save location and name the template. to
save (export) the current template (table). Navigate to a
save location and name the template. |
|
Import Template |
Click
 to
load a saved template into the template list. Navigate
to a location and import the saved template. to
load a saved template into the template list. Navigate
to a location and import the saved template. |
|
Set Cut and Fill Conditions to Match |
Tick on to apply only the Cut condition results to
both cut and fill conditions. |
|
Logic Actions |
Logic checks that allow non-sequential movement in the list
or execute deletions |
| Test Depths |
Tests for certain depth conditions being met
Inputs are as follows:
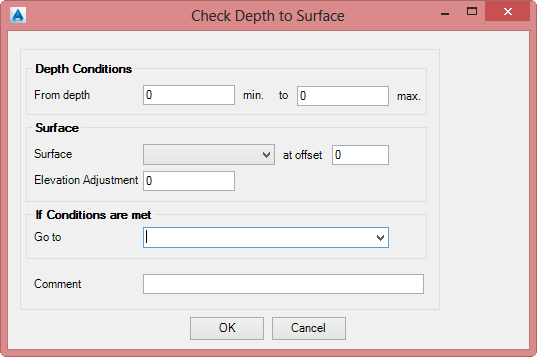
| Depth Conditions |
|
| Depth Range |
Set the depth range at the start of the
section, from a minimum to a maximum depth.
Type in the depth range - if the start of the section
(current depth at the entry) is within the depth range then
the Go to conditions are applied -
otherwise control passes to the next line.
Note: depths are signed. Depths for cut are
positive (+ve) and for fill are negative (-ve).
|
| Surface |
|
| Surface |
Surface to test against for depth condition.
If left blank or set to Default, then the Sampled Surface
(for the string to which the template is applied) is used.
Available selections are: Default, Surface 1 to Surface 5.
Actual surfaces are applied at the time of applying the
template to a String |
| at offset |
Offsets the surface horizontally (+ve right
and -ve left) for checking depths |
| Elevation adjustment |
Offsets the surface vertical (+ve raise up
and -ve lower down) for checking depths |
| If Conditions are
met |
Sets what to do if the
depth conditions are satisfied. |
| Go to |
Sets where to go in the list if the conditions are met.
Options are:
- Type in the name of a Label - this allows for the
Go to Label to be set before a Label is
created. Go to names and Label names must match or
control will pass to the next line
- Select from list:
- Next line: goes to the next line in the list
- End Batter: stops the section creation
completely (no more sections created and no further
checking in the list)
- [Any created Label]: All existing Labels are
listed here for direct selection.
|
| Comment |
Add a comment |
| OK |
Add the entry |
| Cancel |
Exit without
adding/updating the entry. |
|
|
Test Intercept |
Tests for intercept of a section.
Inputs are as follows:
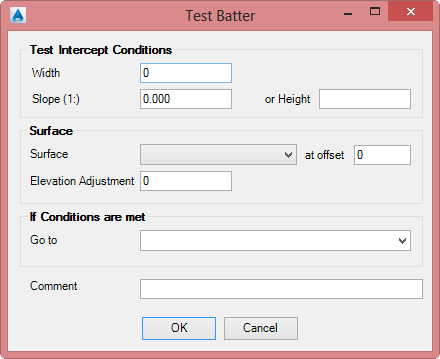
| Test Intercept
Conditions |
|
| Width |
Width of section to test for intercept |
| Slope (1:x) |
Slope of section |
| Or height |
Optional height of section - use positive
values in cut to move upwards, and in fill to move
downwards. |
| Surface |
|
|
Surface |
Surface to test against
for depth condition.
If left blank or set to Default, then the Sampled Surface
(for the string to which the template is applied) is used.
Available selections are: Default, Surface 1 to Surface 5.
Actual surfaces are applied at the time of applying the
template to a String |
| at offset |
Offsets the surface horizontally (+ve right
and -ve left) for checking depths |
| Elevation adjustment |
Offsets the surface vertical (+ve raise up
and -ve lower down) for checking depths |
| If Conditions are
met |
Sets what to do if the
depth conditions are satisfied. |
| Go to |
Sets where to go in the list if the conditions are met.
Options are:
- Type in the name of a Label - this allows for the
Go to Label to be set before a Label is
created. Go to names and Label names must match or
control will pass to the next line
- Select from list:
- Next line: goes to the next line in the list
- End Batter: stops the section creation
completely (no more sections created and no further
checking in the list)
- [Any created Label]: All existing Labels are
listed here for direct selection.
|
| Comment |
Add a comment |
| OK |
Add the entry |
| Cancel |
Exit without
adding/updating the entry. |
|
|
Go To |
At this entry, the Go To label jumps to a different location in
the list
Inputs are as follows:
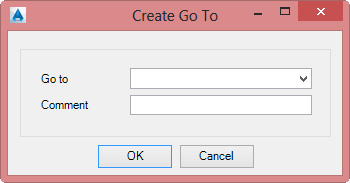
| Go to |
Sets where to go in the list if the conditions are met.
Options are:
- Type in the name of a Label - this allows for the
Go to Label to be set before a Label is
created. Go to names and Label names must match or
control will pass to the next line
- Select from list:
- Next line: goes to the next line in the list
- End Batter: stops the section creation
completely (no more sections created and no further
checking in the list)
- [Any created Label]: All existing Labels are
listed here for direct selection.
|
| Comment |
Add a comment. |
| OK |
Create the entry |
| Cancel |
Exit without
adding/updating the entry. |
|
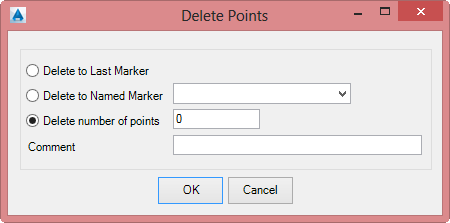
| Undo
to Marker |
At this entry, sections are deleted, from the current position to
a set position (normally to a named Marker, or a number of list
entries). Control then passes to the next entry.
| |
List of options for where
to stop the undo (deletion of sections) |
| Delete to Last Marker |
Delete (undo) all created sections (entries)
from the current location up to the last Marker added |
| Delete to Named Marker |
Delete (undo) all created sections (entries) from the
current location up to a specific Marker in the list.
Options are:
- Type in the name of a Marker - this allows for the
Marker name to be set before a
Marker is
created and placed in the list. The name set here
must match a Marker name for the undo
to be applied
- Select from list of Markers created
|
| Delete Number of Points |
Delete a specific number of listed entries
(points) from the current location up. Logic entries
are not counted in the points (entries) deleted |
| Comment |
Add a comment. |
| OK |
Apply and
exit |
| Cancel |
Cancel |
|
|
Logic Items |
Logic items provide a place in the
list to go to, a place in the list to delete (undo) to, force a
finish to the calculation of sections and more |
|
Add Comment |
Adds a comment in the list only. Has no impact on
calculations.
Inputs are as follows:
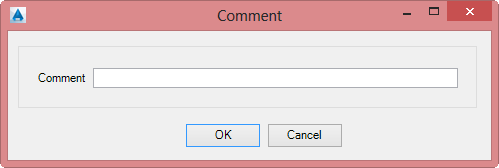
| Comment |
Type in a comment |
| OK |
Add/Update the entry |
| Cancel |
Exit without
adding/updating the entry. |
|
|
Force Finish |
If this entry is reached, no further section calculations are
undertaken.
Inputs are as follows:
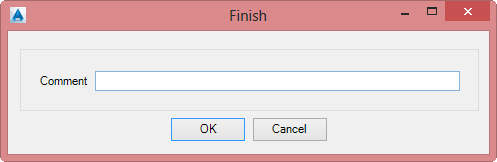
| Comment |
Type in a comment |
| OK |
Add/Update the entry |
| Cancel |
Exit without
adding/updating the entry. |
|
|
Add Label |
Adds a Label entry - typically used with the Go To Logic Action
to allow for jumping through the list of entries.
Inputs are as follows:
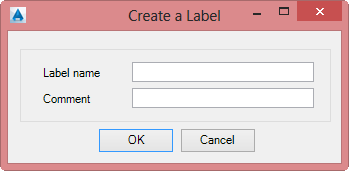
| Label Name |
Type in a name for the label |
| Comment |
Add a comment. |
| OK |
Create/Update the entry |
| Cancel |
Exit without
adding/updating the entry. |
|
| Marker |
At this entry, any Undo (delete sections) can be set to stop
here. This marker sets up an 'Undo to' point for removing
sections.
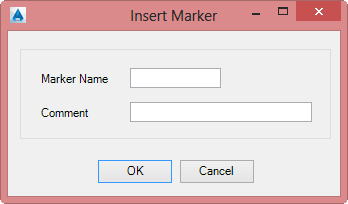
| Marker Name |
Type in a name (identifier) for the Marker |
| Comment |
Add a comment. |
| OK |
Add/Update the entry |
| Cancel |
Exit without adding/updating the entry. |
|
|
Logic Items |
Logic items provide a place in the
list to go to, a place in the list to delete (undo) to, force a
finish to the calculation of sections and more |
|
Width by Slope |
Adds a section with a specified with and slope (or height)
Inputs are as follows:
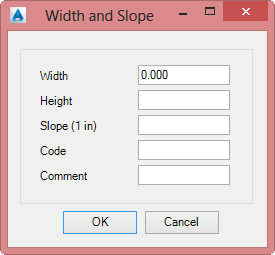
| Width |
Width of section |
| Height |
Optional height of section - use positive
values in cut to move upwards, and in fill to move
downwards. |
| Slope (1:x) |
Slope of section (1: prefix is NOT required) |
| Code |
Type in a Code name for
the end of the section. Used in plotting and display |
| Comment |
Add a comment |
| OK |
Add/Update the entry |
| Cancel |
Exit without
adding/updating the entry. |
|
|
Width by XFall |
Adds a section with a specified with and crossfall grade (or
height)
Inputs are as follows:
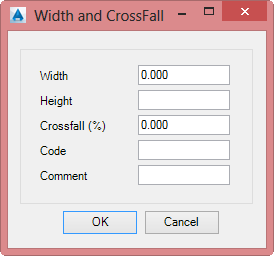
| Width |
Width of section |
| Height |
Optional height of section - use positive
values in cut to move upwards, and in fill to move
downwards. |
| Crossfall (%) |
Type in a crossfall in percent (% symbol is
NOT required) |
| Code |
Type in a Code name for
the end of the section. Used in plotting and display |
| Comment |
Add a comment |
| OK |
Add/Update the entry |
| Cancel |
Exit without
adding/updating the entry. |
|
|
Width to Surface |
Adds a section with a specified with and projecting to a
specified surface
Inputs are as follows:
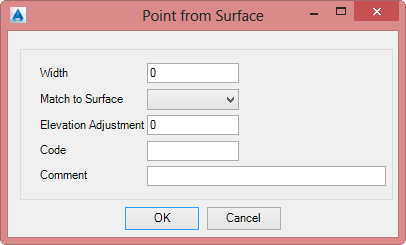
| Width |
Width of section |
| Match to Surface |
Surface elevation to apply at the specified
Width.
If left blank or set to Default, then the Sampled Surface
(for the string to which the template is applied) is used.
Available selections are: Default, Surface 1 to Surface 5.
Actual surfaces are applied at the time of applying the
template to a String |
| Elevation Adjustment |
Set an elevation above (+ve) or below (-ve)
the surface for intercept |
| Code |
Type in a Code name for the end of the
section. Used in plotting and display |
| Comment |
Add a comment |
| OK |
Add/Update the entry |
| Cancel |
Exit without
adding/updating the entry. |
|
|
Width to String |
Adds a section with a specified with and matching vertically to a
String (Profile)
Inputs are as follows:
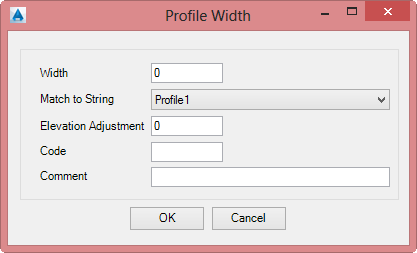
| Width |
Width of section |
| Match to String |
String elevation to apply at the specified
Width.
If left blank, then no String can be assigned for
elevations.
Available selections are: Profile 1 to Profile 5.
Actual Strings are assigned at the time of applying the
template to a String |
| Code |
Type in a Code name for the end of the
section. Used in plotting and display |
| Comment |
Add a comment |
| OK |
Add/Update the entry |
| Cancel |
Exit without
adding/updating the entry. |
|
|
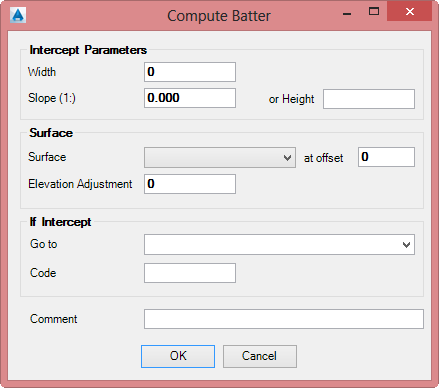
Batter |
Adds a section that intercepts with a surface. The section
truncates at the intercept with the surface.
If the section does not intercept the surface within the width
specified, the section is not
created and control passes to the next line.
Inputs are as follows:
| Intercept
Parameters |
|
| Width |
Specify a width within which to intercept the surface |
| Slope (1:) |
Set a slope for the section to create |
| or Height |
Optional height to use with the width, instead of using the
Slope (1:) value |
| Surface |
|
| Surface |
Surface to intercept. The section
truncates at the surface.
If left blank or set to Default, then the Sampled Surface
(for the string to which the template is applied) is used.
Available selections are: Default, Surface 1 to Surface 5.
Actual surfaces are applied at the time of applying the
template to a String |
| at offset |
Offsets the surface horizontally (+ve right
and -ve left) for intercept |
| Elevation adjustment |
Offsets the surface vertically (+ve raise up
and -ve lower down) for intercept |
| If Intercept |
Sets what to do if the
section is created. |
| Go to |
Sets where to go in the list if an intercept is found
within the width specified.
Options are:
- Type in the name of a Label - this allows for the
Go to Label to be set before a Label is
created. Go to names and Label names must match or
control will pass to the next line
- Select from list:
- Next line: goes to the next line in the list
- End Batter: stops the section creation
completely (no more sections created and no further
checking in the list)
- [Any created Label]: All existing Labels are
listed here for direct selection.
|
| Code |
Type in a Code name for the end of the
section. Used in plotting and display |
| Comment |
Add a comment |
| OK |
Add the entry |
| Cancel |
Exit without
adding/updating the entry. |
|
|
Bench |
Adds multiple sections representing (typically) a benched
batter/daylight arrangement.
Inputs are as follows:
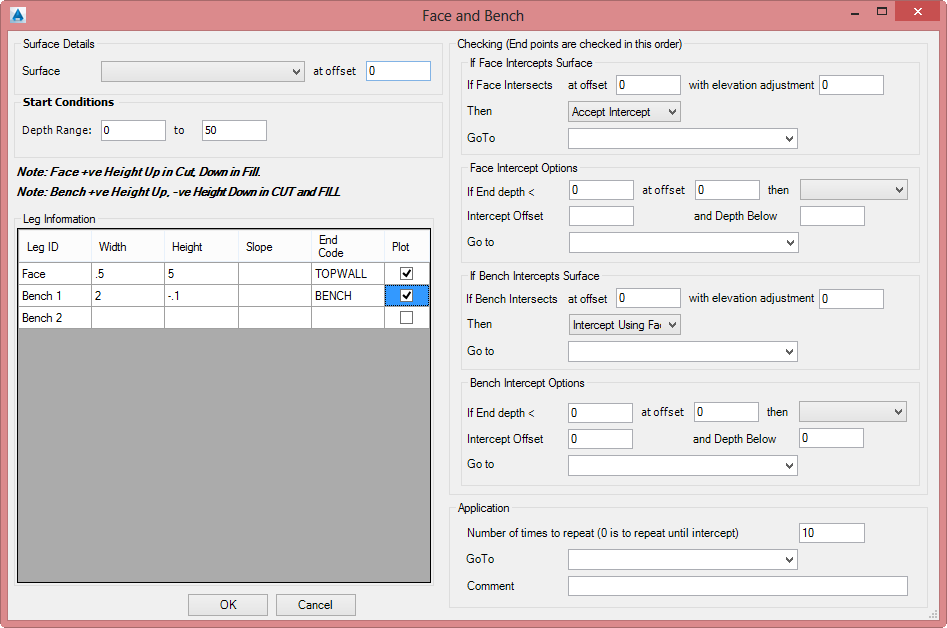
| Surface Details |
Sets the surface to
intercept |
| Surface |
Surface to intercept. The section truncates at the
surface.
If left blank or set to Default, then the Sampled Surface
(for the string to which the template is applied) is used.
Available selections are: Default, Surface 1 to Surface 5.
Actual surfaces are applied at the time of applying the
template to a String |
| at offset |
Offsets the surface horizontally (+ve right
and -ve left) for intercept |
| Start Conditions |
Sets a depth range for
which to apply the benching |
| Depth Range |
Set the depth range at the start of the
section, from a minimum to a maximum depth.
Type in the depth range - if the start of the section
(current depth at the entry) is within the depth range then
the Go to conditions are applied -
otherwise control passes to the next line.
Note: depths are signed. Depths for cut are
positive (+ve) and for fill are negative (-ve).
|
| Leg Information |
Table to specify the
width/height of the Face of the wall and the widths/heights
of Bench sections. Inputs are: |
| Leg ID |
The first entry is for the Face. All other lines
enable multiple sections for the Bench |
| Width |
Specify a width for the section |
| Height |
Specify a height for the section. Leave blank to
specify by slope.
Notes:
Positive values for the FACE move upwards in cut, and
downwards in fill
For the Bench sections, positive values are always a move
upwards, and negative values always a move downwards |
| Slope |
Option to specify a slope, on the basis of rise:run (1:)
Notes:
Positive values for the FACE move upwards in cut, and
downwards in fill
For the Bench sections, positive values are always a move
upwards, and negative values always a move downwards |
| End Code |
Type in a Code for the section |
| Checking |
Enables trimming of the
bench at surface intercept, and extending of the bench or
face to force surface intercept. Also enables surface
intercept to be adjust up/down. |
| If Face
Intercepts Surface |
| at offset |
Offsets the surface horizontally (+ve right
and -ve left) for intercept |
| with elevation
adjustment |
Offsets the surface vertically (+ve raise up
and -ve lower down) for intercept |
| Then |
If intercept is found, pick what do do. Options:
- Accept Face: Insert the Face section without
trimming at the surface intercept
- Accept Intersect: Insert the Face section and trim
to the surface intercept
- Abandon Face: Do not create the face section and
apply GoTo settings
- Abandon All: remove all benching sections and apply
GoTo settings
|
| Go To |
If the Face Intercept conditions are met, then this GoTo
condition will be applied.
Options are:
- Type in the name of a Label - this allows for the
Go to Label to be set before a Label is
created. Go to names and Label names must match or
control will pass to the next line
- Select from list:
- Next line: goes to the next line in the list
- End Batter: stops the section creation
completely (no more sections created and no further
checking in the list)
- [Any created Label]: All existing Labels are
listed here for direct selection.
|
|
| Face Intercept
Options |
| If End
Depth < |
Check depth if face intercepts |
| At Offset |
Checks intercept at a horizontal offset on the surface |
| Then |
If intercept is found within the End Depth, pick what do do. Options:
- Accept Face: Insert the Face section without
trimming at the surface intercept
- Accept Intersect: Insert the Face section and trim
to the surface intercept
- Abandon Face: Do not create the face section and
apply GoTo settings
- Abandon All: remove all sections and apply GoTo
settings
|
| Intercept
Offset |
Intercept the surface (+ve right
and -ve left) at an optional offset from the surface |
| and Depth
Below |
Intercept the surface (+ve raise up
and -ve lower down) at an optional depth from the surface |
| Go To |
If these Face Intercept conditions are met, then this Go To
condition will be applied.
Options are:
- Type in the name of a Label - this allows for the
Go to Label to be set before a Label is
created. Go to names and Label names must match or
control will pass to the next line
- Select from list:
- Next line: goes to the next line in the list
- End Batter: stops the section creation
completely (no more sections created and no further
checking in the list)
- [Any created Label]: All existing Labels are
listed here for direct selection.
|
|
| If Bench
Intercepts Surface |
| at offset |
Offsets the surface horizontally (+ve right
and -ve left) for intercept |
| with elevation
adjustment |
Offsets the surface vertically (+ve raise up
and -ve lower down) for intercept |
| Then |
If intercept is found, pick what do do. Options:
- Accept Bench: Insert the Bench section without
trimming at the surface intercept
- Stop at Bench Intercept: Insert the bench section
and trim to the surface intercept
- Intercept using Face: Extend the Face section until
it intercepts
- Abandon: Do not create the bench section and apply
GoTo settings
- Abandon All: remove all sections and apply GoTo
settings
- Ignore Intercept: Ignore the intercept with the
surface
|
| Go To |
If the Bench Intercept conditions are met, then this GoTo
condition will be applied.
Options are:
- Type in the name of a Label - this allows for the
Go to Label to be set before a Label is
created. Go to names and Label names must match or
control will pass to the next line
- Select from list:
- Next line: goes to the next line in the list
- End Batter: stops the section creation
completely (no more sections created and no further
checking in the list)
- [Any created Label]: All existing Labels are
listed here for direct selection.
|
|
| Bench Intercept
Options |
| If End
Depth < |
Check depth if bench intercepts |
| At Offset |
Checks intercept at a horizontal offset on the surface |
| Then |
If intercept is found
within the End Depth, pick what do do. After applying
the below, the Go To setting is applied. Options:
- Accept : Insert the Bench section/s.
- Delete Bench and Keep Face: Remove the Bench
sections and keep the Face section.
- Delete Bench and Intercept Face: remove the bench
sections and extend the Face until intercept.
- Intercept Bench using Last Slope: Uses the
slope of the last section of the bench parameter to find
intercept
- Abandon: Remove Bench sections
- Abandon All: remove all sections
|
| Intercept
Offset |
Intercept the surface (+ve right
and -ve left) at an optional offset from the surface |
| and Depth
Below |
Intercept the surface (+ve raise up
and -ve lower down) at an optional depth from the surface |
| Go To |
If these Bench Intercept conditions are met, then this Go To
condition will be applied.
Options are:
- Type in the name of a Label - this allows for the
Go to Label to be set before a Label is
created. Go to names and Label names must match or
control will pass to the next line
- Select from list:
- Next line: goes to the next line in the list
- End Batter: stops the section creation
completely (no more sections created and no further
checking in the list)
- [Any created Label]: All existing Labels are
listed here for direct selection.
|
|
| Application |
Establishes overarching
controls for the bench with respect to intercept and
repeating the bench. |
| Number of Times to Repeat |
Stop repeating bench after this number of repeats.
Zero to continue until intercept. |
| Go To |
If no intercept is found within the
specified number of repeats, this Go To is applied. Options
are:
- Type in the name of a Label - this allows for the
Go to Label to be set before a Label is
created. Go to names and Label names must match or
control will pass to the next line
- Select from list:
- Next line: goes to the next line in the list
- End Batter: stops the section creation
completely (no more sections created and no further
checking in the list)
- [Any created Label]: All existing Labels are
listed here for direct selection.
|
| Comment |
Add a comment |
| OK |
Add the entry |
| Cancel |
Exit without
adding/updating the entry. |
|
| Insert |
Controls insertion defaults |
| At End |
New entries are added at the end of the list of
entries |
| after
Current |
New entries are added below the highlighted entry in
the list of entries |
| Zero Depth Is |
Sets up how the section template
should behave when the start point for the
template has zero depth (no cut or fill) |
| Pick List |
Options
are:
- Exit: do not apply any sections for either the cut
or fill condition
- Cut: apply the cut conditions
- Fill: apply the fill conditions
|
| Display
Defaults |
Establishes defaults for the display of referenced surfaces and
strings (profile) to indicate behaviour when a reference surface or
string action is applied.
Inputs are as follows:
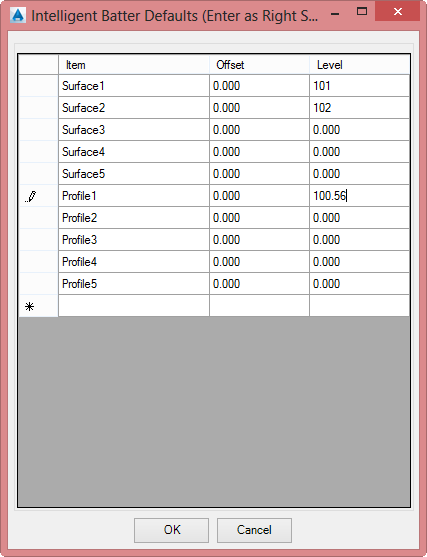
| Table |
Lists the surfaces and
profiles that can be referenced by certain Data Items.
Users set the values to apply |
| Item |
Lists all referenced objects (Surface 1-5 and Profile 1-5) |
| Offset |
Type in an offset from the insertion point of x=0.
Positive moves right and Negative moves left |
| Level |
Type in an assumed elevation for the referenced object.
Note that the default 'start' elevation for the section
template is 100 |
| OK |
Add the entry |
| Cancel |
Exit without
adding/updating the entry. |
|
| Display Controls |
Establishes surface and grid
display controls for the graphical viewer (Preview Window). |
| Vertical Exaggeration |
Set the vertical exaggeration to display in the
preview window |
| Grid Spacing |
Set the grid spacing vertical and horizontal in the
preview window |
| Surface Display |
|
| Depth Increment |
Up/down toggle on the Cut Depth and Fill Depth
raise/lower by this increment. Default is 0.1 units. |
| Cut Depth |
If applying batter controls
in the cut condition, users can use the toggle or type in a cut depth to
display how the sections would behave
Note: if a number has been
typed instead of using the up/down toggle, press [Enter] to update the view |
| Fill Depth |
If applying batter controls in the
cut condition, users can use the toggle or type in a cut depth to display
how the sections would behave
Note: if a number has been typed
instead of using the up/down toggle, press [Enter] to update the view |
| Slope 1: |
Show a slope on the trial matching
surface |
| Show Leg Slopes |
Tick to show slope values on each drawn section |
| Show
Codes |
Show codes on each section |
| Left Hand
Side |
Tick to show a left hand side preview |
| Indent by |
Pick list to apply an indent of (5,10,15,20,...,60)
characters to distinguish Logic Items (Labels/Markers), Logic
Actions (Test Depths, Test Intercept, etc) and Data Items (Width by
Slope, batter, etc). Indent hierarchy:
- Logic Items: not indented
- Logic Actions: indented one level
- Data Items: indented two levels |
| Show Surfaces |
Tick box to display alternate surfaces (Surface1 to
Surface5) as described in Display Defaults |
| Show
Profile |
Tick box to display potential profiles to use
(Profile1 to Profile5) as described in Display Defaults. |
| Refresh Display |
Click to update the graphic
display |
| Close |
Close the window |